
Disclosure: This post may contain affiliate links. As an Amazon Associate, I earn from qualifying purchases. If you click through and make a purchase, I may earn a small commission at no extra cost to you.
Learning how to read a tape measure is a valuable skill. It’s essential for DIY projects, construction, and more.
A tape measure is a simple tool but it can be a bit tricky at first, especially if you’re not familiar with using one regularly.
This guide will help you understand the basics of using a tape measure. If you’re looking for a great beginner tape, this top-rated option on Amazon is perfect for home use.
We’ll cover everything from the anatomy of a tape measure to reading different units. You’ll learn how to read inches, centimeters, and millimeters accurately. Understanding tape measure markings is crucial for precise measurements. We’ll also provide tips for using a tape measure effectively. Whether you’re a beginner or need a refresher, this guide is for you.
Tape measures come in various types and lengths. Knowing which one to use can make a big difference in your projects. We’ll explore the different types and their specific uses. You’ll also learn about common mistakes to avoid when measuring. Accurate measurements are key to successful projects. By the end of this guide, you’ll be confident in using a tape measure.
Understanding Tape Measure Basics
Tape measures are versatile tools found in toolkits everywhere. They help us measure length, width, and height. Understanding how they work is essential for accuracy.
Tape measures consist of a flexible metal or fabric strip. This strip is marked with measurement units, making it easy to read. There are two main systems of measurement on tape measures: imperial and metric. The imperial system uses inches, while the metric system uses centimeters and millimeters.
Selecting the right tape measure type depends on your specific needs. Whether you’re working on home projects or construction, there’s a suitable tape measure for you. Accuracy is key, so keep the tape straight and flat against the measuring surface. This ensures precise readings.
Tape measures have standout features. This means the blade can extend without bending, which is useful for long measurements. Remember to take care of your tape measure. Keep it clean and avoid retracting the blade too quickly to prevent damage.
Using a tape measure also involves interpreting its markings accurately. This skill grows stronger with practice and repeated use.
Here are essential aspects to focus on:
- Know the units of measurement displayed.
- Ensure the tape measure is suitable for the task.
- Maintain your tape measure for longevity and precision.
Understanding these basics leads to better measurement experiences. You’ll soon master the tape measure with practice.
Anatomy of a Tape Measure
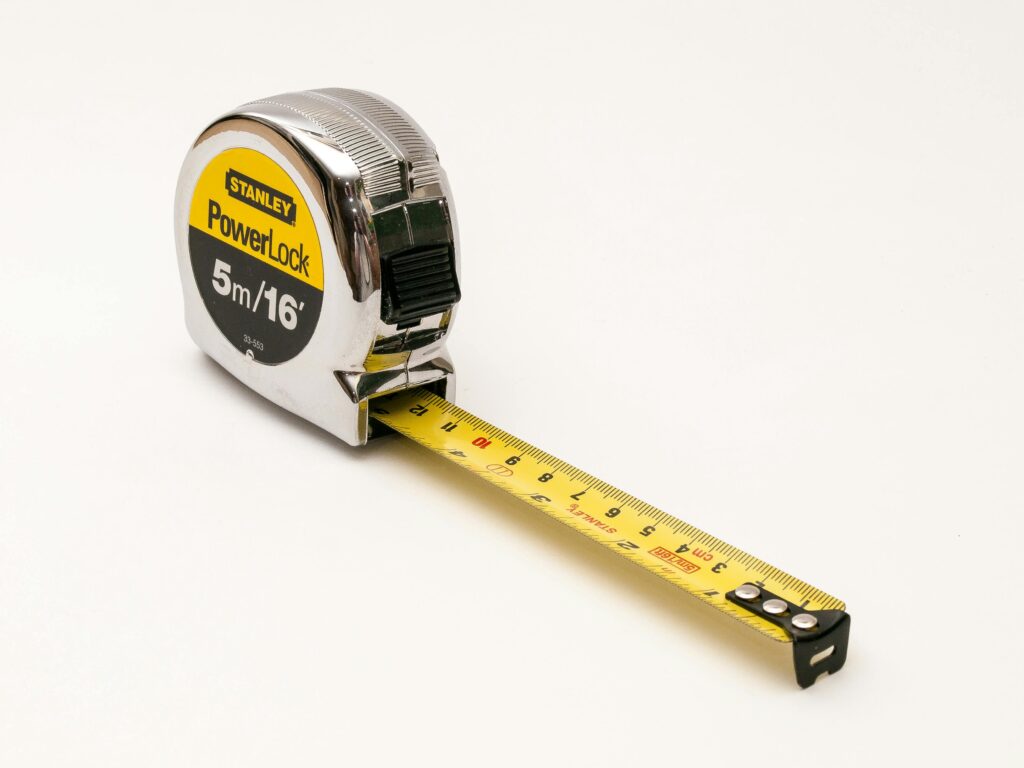
A tape measure’s anatomy is crucial for its operation. Knowing the parts helps ensure accurate and efficient use.
The blade is the most noticeable part. This long, flexible strip is marked with units for measurement. At the end of the blade, you’ll find the hook. This small metal piece secures the tape to the object being measured.
The housing, or case, holds the coiled blade. It protects the tape from wear and damage when not in use. Inside the housing is the lock mechanism. It keeps the blade extended at a desired length.
Look for tape measures with a solid lock, standout feature, and a durable hook—like this one we use personally
Key Parts of a Tape Measure:
- Blade: Marked with units, allows measurement.
- Hook: Secures tape to objects.
- Housing: Protects blade and assists storage.
- Lock: Holds blade in place when measuring.
Some tape measures feature a belt clip. This allows for convenient carrying, especially on job sites.
Hooks can move slightly. This design compensates for its thickness, providing accurate inside and outside measurements.
Regular inspection of these parts ensures your tape measure functions well. A damaged blade can lead to incorrect readings.
Some advanced tape measures include a magnetic hook. This is a helpful feature for attaching to metal surfaces.
In conclusion, understanding the parts of a tape measure enhances your ability to measure correctly. It’s a fundamental skill in various trades and DIY endeavors.
Different Types of Measuring Tape
Numerous types of tape measures are available to suit different applications. Each serves unique needs based on its design and features.
The retractable tape measure is most common. It’s convenient, compact, and suited to many tasks.
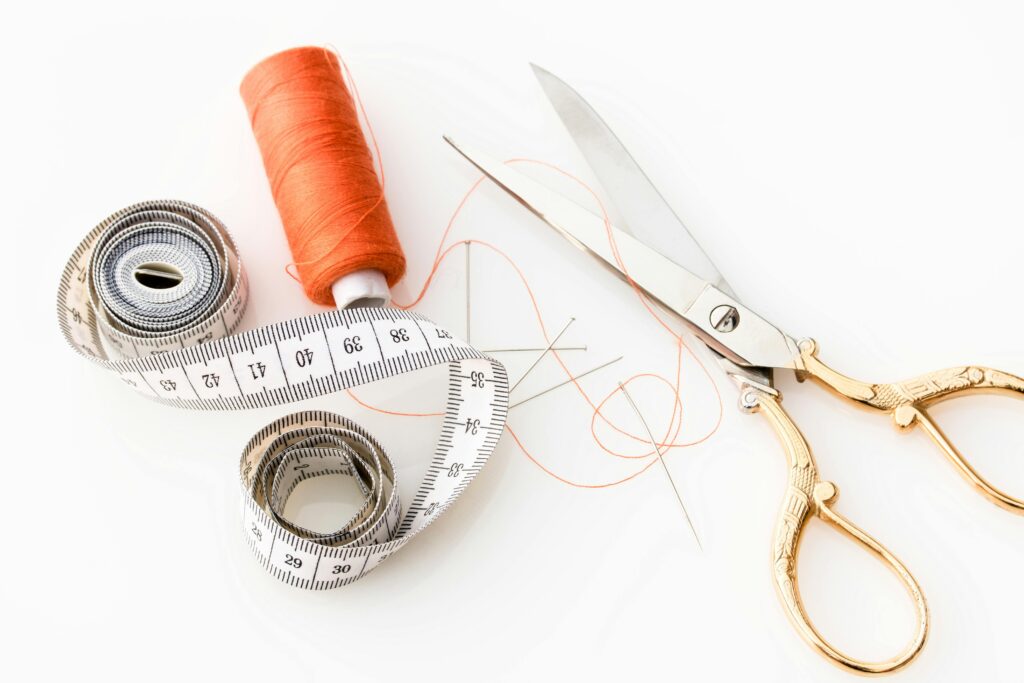
Sewing tape measures, made of soft fabric or plastic, are ideal for tailoring. Their flexibility makes them perfect for measuring curves and body contours.
For construction, choosing a heavy-duty tape measure is wise. These models often have tougher blades and additional features, like magnetic hooks or double-sided markings.
- Retractable: Versatile and easy to store.
- Sewing: Flexible, made for tailoring projects.
- Heavy-duty: Robust, with features for construction use.
If you work with large projects often, consider a long tape measure. These can range up to 100 feet, perfect for expansive spaces.
Some tape measures offer dual markings. They display both metric and imperial units, providing flexibility across different regional requirements.
Digital tape measures are also available. They provide easy-to-read digital displays for fast, accurate readings.
Selecting the appropriate type of tape measure for your task increases efficiency and accuracy. Knowing when to use each kind enhances your toolkit significantly.
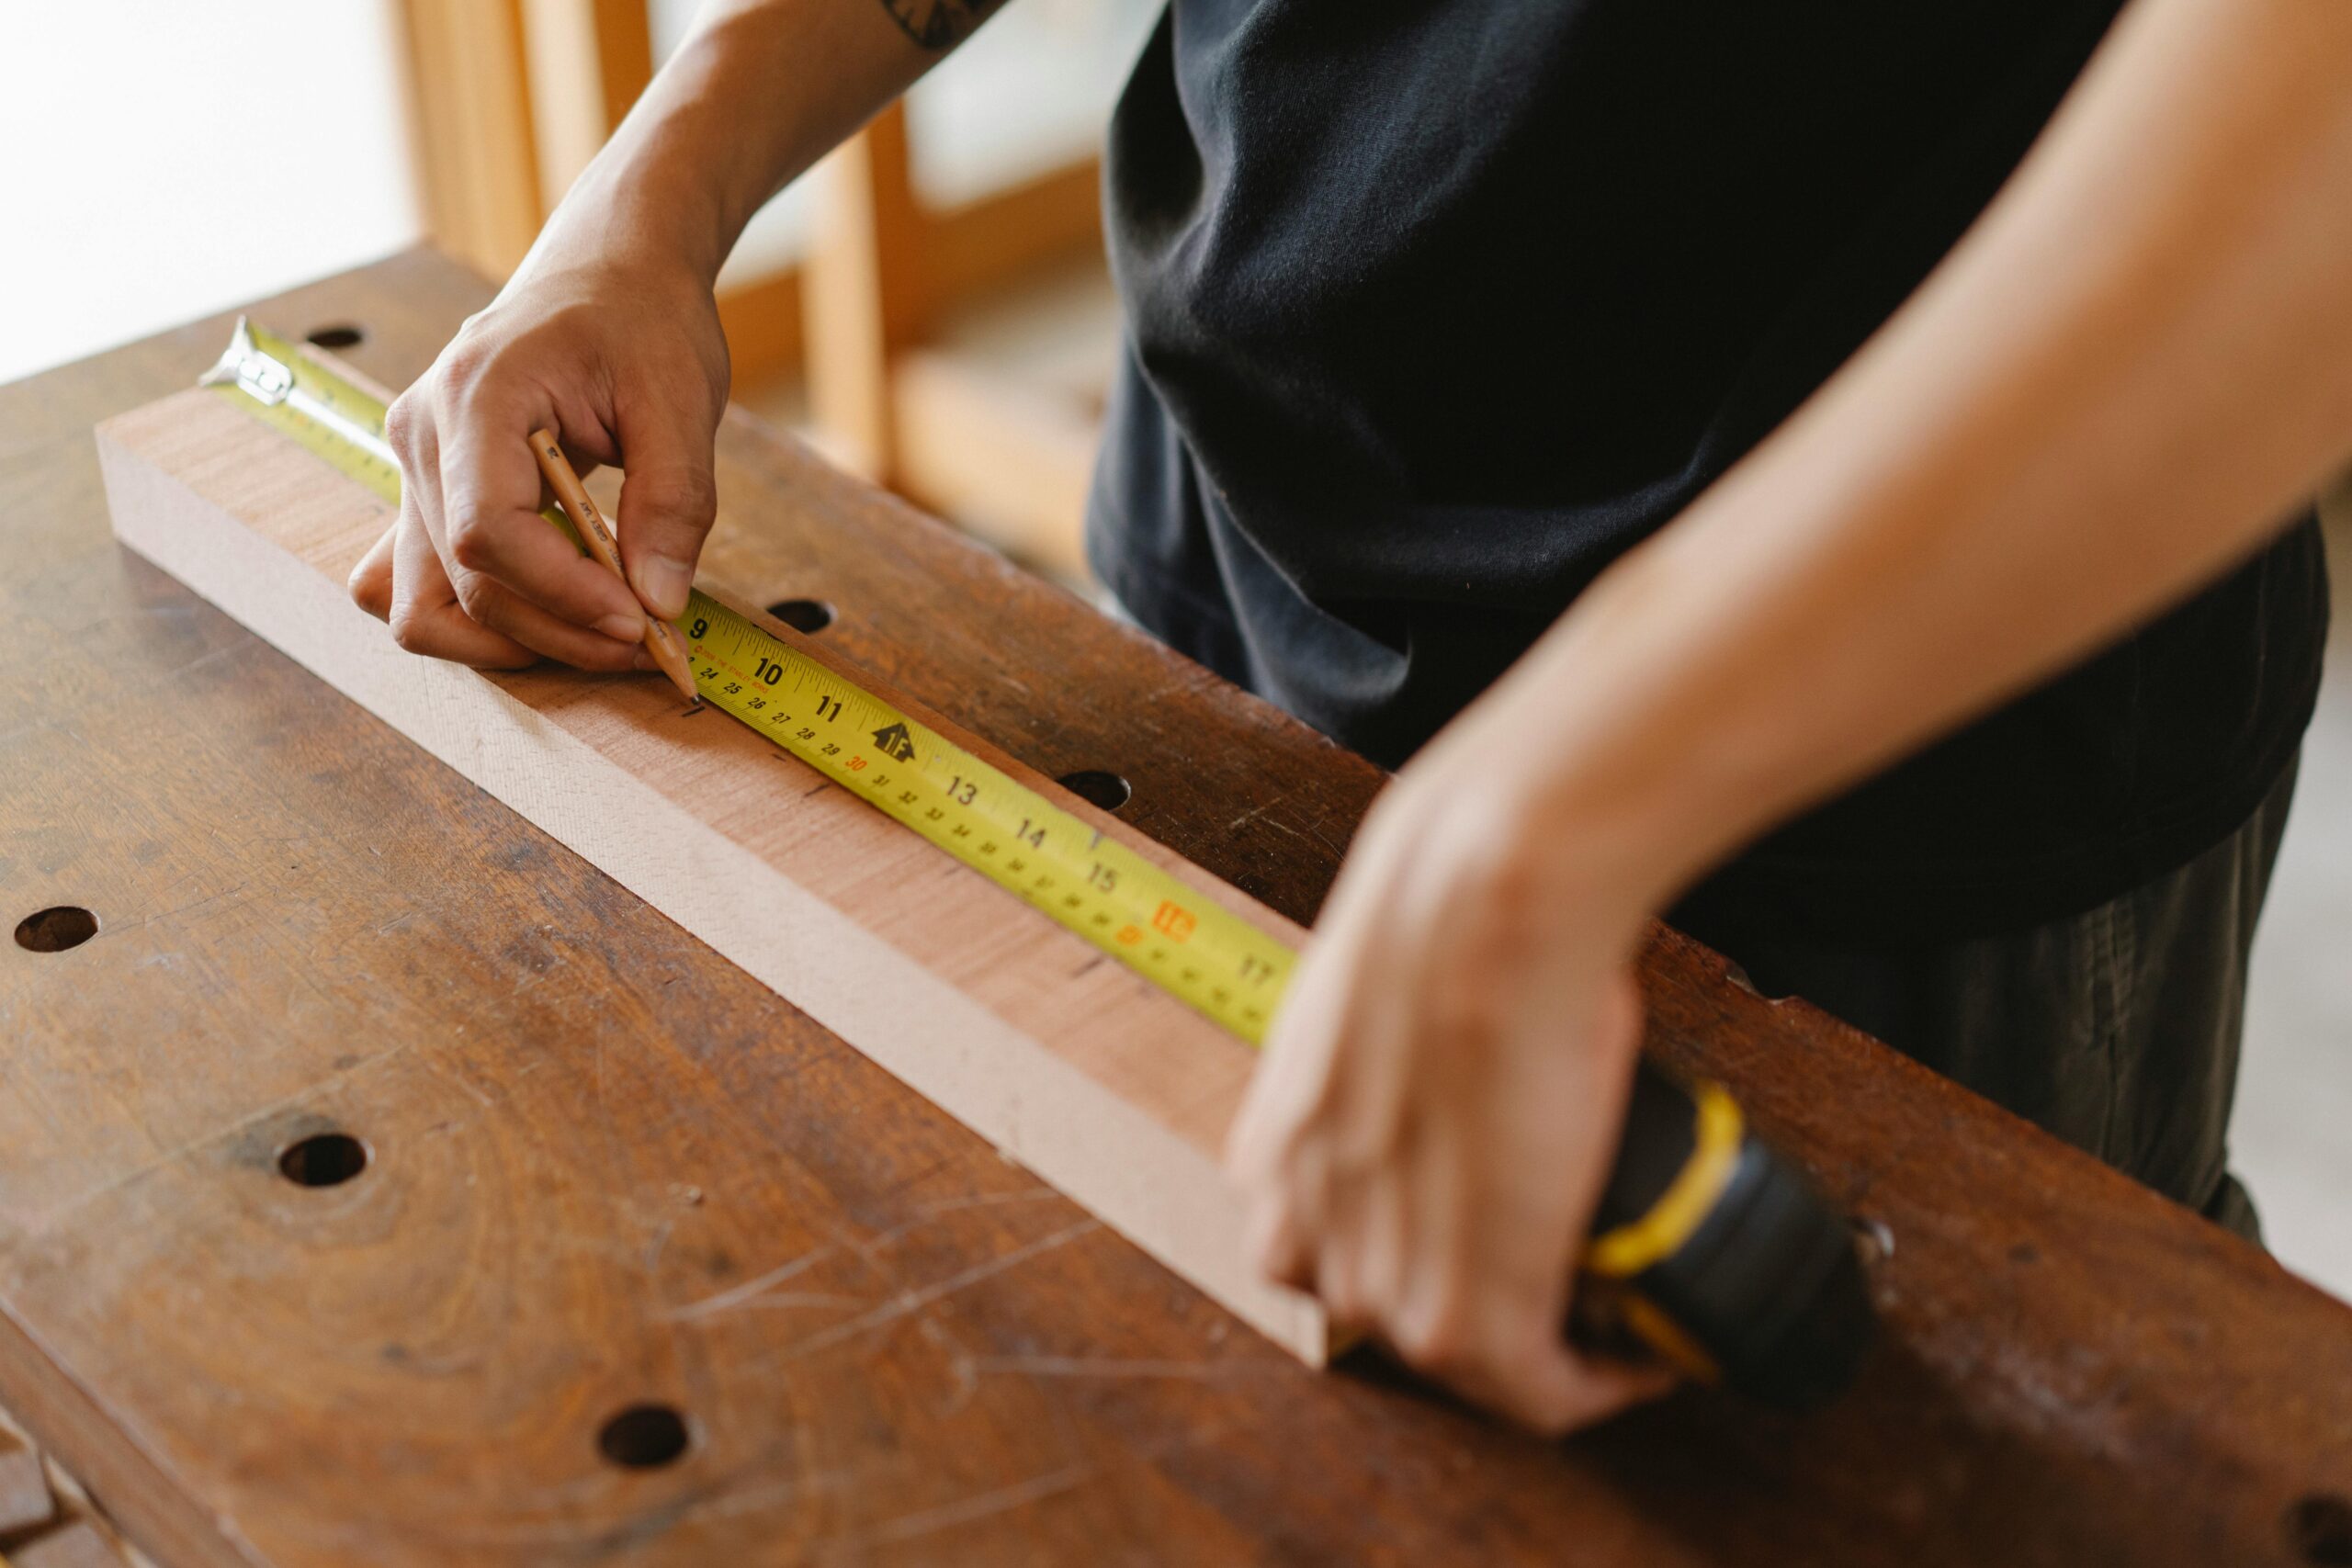
How to Read a Measuring Tape in Inches
Reading a tape measure in inches is straightforward when you understand the markings. The tape is segmented into inches, feet, and fractional inches.
Inch markings are the longest on the tape. They’re usually numbered for easy identification. Each large number denotes a full inch.
Smaller lines between the inch marks represent fractions. These include half-inch, quarter-inch, eighth-inch, and sixteenth-inch increments. Familiarize yourself with these segments for better accuracy.
It’s crucial to understand these fractions for precise measurements. Incorrect readings can lead to errors in your project. Take the time to count the smaller lines between full inches.
Some tapes also show foot markers. These are helpful when measuring larger objects or areas. They often appear as highlighted or distinct numbers.
Quick Steps for Reading Inches:
- Identify the nearest large number.
- Count the smaller fractional lines beyond the full inch.
- Add the fractional measurement to the whole inch number.
Tools like a cheat sheet can help decode these increments faster. Over time, recognizing these becomes second nature.
Precision in reading measurements directly impacts your project’s outcome. Consistent practice will enhance your confidence and accuracy in interpreting these tape measure markings.
Identifying Inch Markings
Inch markings are the backbone of the imperial system on tape measures. Each inch is divided into smaller segments for detailed readings.
The largest lines indicate full inches. These are often numbered every few inches for easy reference. Just above each large line is typically the number representing the inch value.
Between each inch mark, there are additional lines. The second largest often represents half an inch. This subdivision is easily identifiable due to its length.
Smaller lines represent quarter, eighth, and sixteenth-inch increments. As you look closer, these smaller marks stand in decreasing lengths on the tape.
Understanding Inch Segments:
- Inch: Largest and numbered.
- Half-Inch: Second largest.
- Quarter, Eighth, Sixteenth: Successively smaller markings.
Recognizing these subdivisions requires practice and focus. Measuring tapes can be busy, but spotting these lines helps ensure precise measurements.
Knowing these markings allows you to move beyond approximate measurements. You’ll calculate precise dimensions swiftly and accurately.
Over time, reading these segments becomes second nature. It’s about memorizing patterns and applying them regularly.
Reading Fractional Inches
Fractional inches add detail to your measurement efforts. They’re especially important in fine work like carpentry or DIY crafts.
Starting from a full inch mark, the smaller lines between indicate fractional parts. Half, quarter, eighth, and sixteenth-inch lines offer specific measurements within an inch.
Each marked line represents an exact fraction. Learning these fractions improves your accuracy significantly when measuring.
Tips for Reading Fractional Inches:
- Count lines starting after each inch.
- Identify the fractional segment quickly.
- Use a cheat sheet until you memorize them.
Understanding fractions on a measuring tape is a necessary skill. It prevents errors and boosts efficiency in various projects.
Counting fractional lines may seem daunting at first. Keep practicing, and soon, interpreting these increments will become intuitive.
With regular use, identifying fractional parts will be almost automatic. Trust in continuous learning and practice this essential skill to enhance your measurement capabilities.
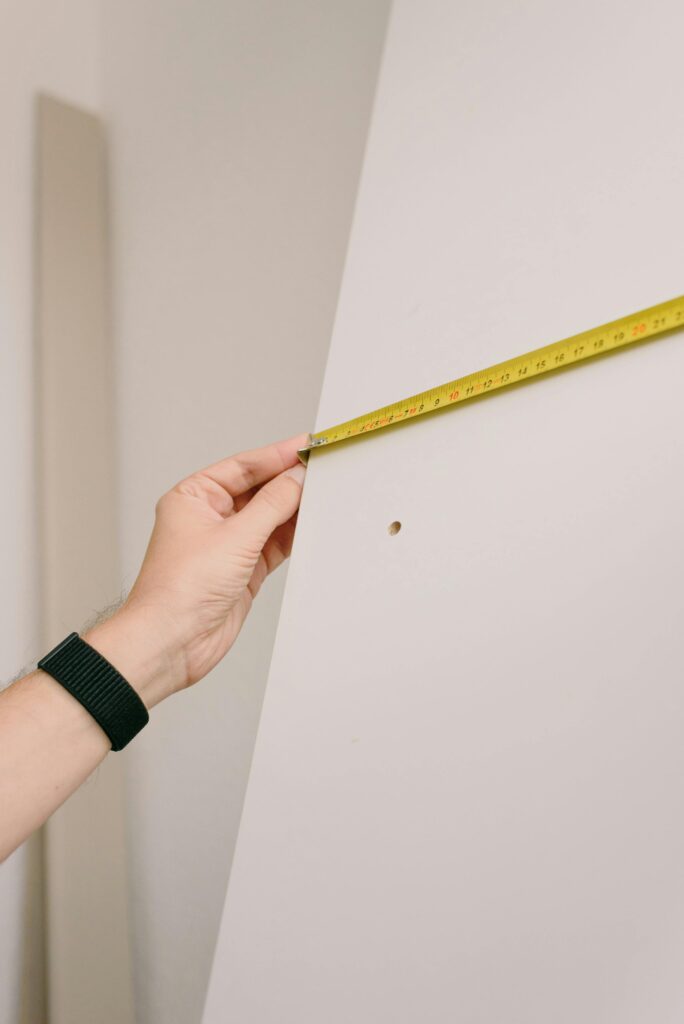
How to Read a Tape Measure in Centimeters
Reading a tape measure in centimeters is essential for those accustomed to the metric system. Centimeter markings are simple and straightforward.
On the tape, larger numbers represent full centimeters. Each centimeter is prominently displayed for clarity.
Between each centimeter mark, find smaller lines that indicate millimeters. These lines are shorter and closer together.
Millimeters are crucial for precise measurements. Ten millimeters make up one centimeter. This allows for exact readings.
This metric system is based on tens, making calculations easier. Precise readings prevent errors and improve the quality of work.
Essential Steps for Reading in Centimeters:
- Locate the closest large centimeter number.
- Count millimeter lines after the full centimeter.
- Combine these for a precise measurement.
Understanding these markings requires a bit of practice but offers great advantages. Mastery of this will enhance your projects’ accuracy.
Different projects may require you to switch between systems. Gaining confidence in reading both inches and centimeters is beneficial.
With practice, reading a tape measure in centimeters becomes second nature. The metric system’s logic eases the measurement process significantly.
Understanding Centimeter and Millimeter Markings
Centimeter markings are distinct and easy to spot. They mark out the entire length of the tape measure prominently.
Each large number indicates a full centimeter. These numbers make identifying specific points along the tape simple.
Smaller lines between these numbers denote millimeters. Each short line stands for a millimeter, facilitating precise work.
The proximity of these lines makes fine measurements possible. This is critical for projects with stringent specifications.
Breakdown of Metric Divisions:
- Centimeter: Large numbers.
- Millimeter: Smaller, unmarked lines between centimeters.
The metric system’s base-ten structure simplifies understanding. Most people find it intuitive and straightforward for exact measurements.
Familiarity with these finer divisions aids in achieving the desired precision. For project success, pay close attention to these minute readings.
Practice enhances speed and precision. Frequent use of these measurements builds your ability to quickly identify necessary lines.
How to Read Centimeters and Millimeters on a Measuring Tape
Reading centimeters and millimeters requires a trained eye. Start by identifying the large centimeter markings as your baseline.
Adjacent to each centimeter, count millimeter lines for more exact readings. This step is crucial for detailed measurement work.
Combining these two readings—centimeters and millimeters—yields an accurate result.
Quick Guide:
- Find the large centimeter mark closest to your point.
- Count the millimeter lines past it.
- Add this count to the full centimeters.
Making these calculations becomes easier with practice. The more you engage with your tape measure, the swifter this process becomes.
Remember, comfort with these measurements can elevate your work precision significantly. With ongoing practice, reading in millimeters and centimeters becomes second nature.
Measurements and Conversions
Understanding measurements and conversions is vital when using a tape measure. Often, projects require switching between metric and imperial systems.
A conversion chart serves as a helpful tool. It simplifies the transition between inches and centimeters.
Accurate conversions lead to greater precision in your projects. This is essential for tasks that require detailed measurements.
Having a conversion chart nearby saves time. It eliminates the need for mental math or online searches.
Such charts provide quick references. Knowing how to use them effectively boosts efficiency and accuracy.
Essential Measurement Conversion Tips:
- Identify Required Units: Determine which units (inches or centimeters) are needed for your project.
- Use Conversion Chart: Refer to the chart to convert measurements swiftly.
- Check Accuracy: Always double-check converted measurements for precision.
Familiarity with conversions can make a significant difference. It reduces the risk of errors, enhancing the project’s quality.
Proficiency with a tape measure means understanding its full range. This includes effective use of conversion tools.
Tape Measure Conversion Chart
A tape measure conversion chart is an indispensable resource. It allows for seamless switching between measurement systems.
This chart lists common conversions between inches and centimeters. It acts as a quick guide for accuracy and convenience.
Using a conversion chart minimizes mistakes. It’s especially useful in professions requiring frequent measurement adjustments.
Common Conversions:
- 1 inch = 2.54 centimeters
- 1 centimeter = 0.3937 inches
Having these conversions memorized can be beneficial. However, a chart is handy for less common conversions.
Charts are typically easy to read and neatly organized. They provide a clear reference point for all your measurement needs.
Implementing such resources ensures precision in your work. This ultimately leads to better project outcomes.
Employing a conversion chart complements your tape measure skills. Together, they enhance your ability to measure accurately.
How to Convert Inches to Centimeters
Converting inches to centimeters requires a straightforward formula. Understanding this conversion is essential for accurate measurements.
To convert inches, multiply by 2.54. This factor shifts the measurement into the metric system.
This conversion is frequently used in various fields. Construction, sewing, and engineering often require switching between systems.
Conversion Steps:
- Measure in Inches: Determine the measurement in inches.
- Apply Conversion: Multiply the inches by 2.54 to convert to centimeters.
- Double-check: Confirm the conversion for accuracy.
This method yields precise centimeter values. It ensures consistency when dealing with metric projects.
Comfort with this conversion process enhances efficiency. It equips you to tackle projects requiring multiple measurement systems.
Proficiency in converting measurements highlights your expertise. It demonstrates attention to detail and commitment to high-quality results.
Tips for Accurate Measurement
Precision is key when using a tape measure. It ensures that your projects are executed seamlessly and professionally. A few simple practices can greatly enhance your measuring accuracy.
First, ensure your tape measure is in top condition. A bent or damaged blade can result in inaccurate readings. Regular maintenance, like cleaning and proper storage, extends the life of your tool.
Before measuring, take a moment to plan how you will hold and read the tape. Confirm the tape is fully extended and taut to avoid sagging. This prevents distortions in the measurement.
Make sure to use the correct units for the task. Verify whether your project requires metric or imperial measurements. Understanding the difference helps prevent errors.
Take time to practice measuring on various surfaces and angles. This builds confidence and helps you become more adept in complex situations. Practicing sharpens your skills and boosts efficiency.
Best Practices for Accurate Measurements:
Hold Steady: Keep the tape measure stable during measurement.
Mark Clearly: Use a pencil to make clear marks; this aids in transferring measurements.
Double-check: Always re-measure critical dimensions for reassurance.
Common Mistakes to Avoid
Avoiding common mistakes can significantly improve the accuracy of your measurements. Many errors stem from carelessness or oversight. Awareness is the first step to improvement.
One frequent mistake is not keeping the tape straight. Curved tape results in inaccurate measurements. Ensure the blade is tight and flat against the surface.
Pay attention to your unit selection. Misunderstanding the units can lead to dimensional errors. Verify that you’re using the correct system, whether metric or imperial.
Mistakes to Watch Out For:
- Ignoring Alignment: Measure parallel to the edge for consistency.
- Overlooking Wear: Inspect the tape for wear and tear regularly.
- Neglecting to Lock: Use the lock feature to hold the tape in place.
How to Measure Angles with a Tape Measure
Measuring angles requires additional tools but is fundamental in various projects. While a tape measure alone isn’t enough for angles, it’s still essential.
Combine your tape measure with a protractor or angle finder for effective measurement. This combination provides precise angular readings.
Before beginning, ensure you have a clear view of the area. This ensures accuracy and reduces the chance for error in your measurements.
Steps to Measure Angles:
- Place Tape: Lay the tape measure across the angle.
- Use a Protractor: Align a protractor to the angle’s vertex.
- Read the Angle: Use the protractor to determine the angle in degrees.
This method is straightforward and ensures precision in your work. Mastering this skill is critical for both simple and complex projects.
How to Measure Accurately with a Tape Measure
Accurate measurement is essential for quality work. It ensures that dimensions align with project requirements. Mastery requires practice and attention to detail.
Firstly, familiarize yourself with the tape measure’s features, such as the blade and lock. Using these features improves control and precision.
When measuring, ensure the tape is snug against the surface. Avoid any gaps that might lead to measurement errors. Precision requires close contact with the object being measured.
Understand the significance of the hook at the end of the tape. This small detail compensates for internal and external measurements. Adjust accordingly when taking different types of measurements.
For long distances, the standout feature is useful. This refers to how far the tape can extend without support. Knowing this can help prevent the tape from bending during critical measurements.
Tips for Ensuring Accuracy:
- Align Properly: Always begin at the tape’s zero point.
- Check Scaling: Ensure you’re reading from the correct scale (imperial or metric).
- Be Consistent: Use the same measurement system throughout your project.
By adhering to these guidelines, you’ll achieve more accurate and reliable measurements. This proficiency translates to higher quality results and greater confidence in any project.